A floating bench offers a unique blend of modern design and practical function, making it a stylish addition to any room, patio, or garden. Unlike traditional benches, a floating bench is mounted directly to a wall, creating the illusion that it’s suspended in mid-air.
This minimalist design not only looks clean and sophisticated but also opens up floor space, making your area feel larger and less cluttered. Building one yourself is a rewarding project that allows you to customize the size, material, and finish to perfectly match your decor.
This guide on how to build a floating bench will walk you through everything you need to know, from planning and gathering materials to the final installation.

What Will You Need?
Before you begin, gathering all the necessary tools and materials will make the process much smoother.
Materials:
- Lumber for the frame (2x4s are a common choice)
- Lumber for the bench top and sides (e.g., 1×6 or 1×8 pine, oak, or cedar boards, or a single solid slab)
- Plywood for the bottom panel (3/4 inch thickness recommended)
- Wood screws (3-inch for the frame, 1 1/4-inch for attaching panels)
- Heavy-duty lag screws or bolts for mounting to the wall (at least 4-5 inches long)
- Wood glue
- Wood filler or putty
- Sandpaper (medium and fine grits)
- Your choice of finish (wood stain, paint, or a clear sealant)
Tools:
- Tape measure
- Pencil
- Level
- Stud finder
- Miter saw or circular saw
- Drill with various bit sizes
- Impact driver or socket wrench for lag screws
- Clamps
- Safety glasses
- Dust mask
- Paintbrushes or rags for finishing
10 Easy Steps on How to Build a Floating Bench
Follow these detailed steps to construct and install your beautiful new floating bench. This guide assumes you are building a hollow-box style bench, which is strong, lightweight, and resource-efficient.
Step 1: Measure and Plan
The first and most critical step is planning. Decide where the bench will go and determine its final dimensions. Use a tape measure to figure out the desired length, depth, and height. A standard bench height is around 18 inches from the floor, and a comfortable depth is between 15 and 20 inches. Consider the scale of the room and the bench’s intended use.
For example, a dining bench might be longer and narrower than an entryway bench. Once you have your measurements, use a stud finder to locate the wall studs in your chosen location. Mark them clearly with a pencil. Your bench must be anchored securely to at least two, preferably three or more, studs for adequate support. A poorly anchored bench is a serious safety hazard. Sketch out your design, noting the dimensions for each piece of wood you’ll need to cut. This will serve as your blueprint and cutting list, helping you avoid mistakes and wasted material.

Step 2: Build the Support Frame
The internal support frame is the backbone of your floating bench. It provides the structure and strength needed to support weight. Using 2×4 lumber, you will construct a rectangular ladder-like frame. Start by cutting two long pieces to match the total length of your bench. Then, cut several shorter cross-braces that will fit between these long pieces.
The length of these cross-braces will be your bench’s depth minus the width of the two long 2x4s (which is typically 3 inches total). Space these cross-braces every 16 to 24 inches for robust support. Apply wood glue to the ends of each cross-brace before joining them to the long boards. Use 3-inch wood screws to secure them, drilling two screws through the long board into each end of the cross-brace. Ensure the frame is square and flat as you assemble it. This frame will later be mounted to the wall and will carry the entire load of the bench.
Step 3: Cut the Bench Panels
With the frame built, it’s time to cut the visible parts of your bench—the top, front, sides, and bottom. This is where your choice of wood will really shine. For the top and front, you can use high-quality boards like oak, maple, or cedar for a beautiful finish. Cut the top piece to the full length and depth of your planned bench. Next, cut the front panel and two side panels.
The height of these panels should match the height of your 2×4 frame (typically 3.5 inches). Finally, cut a piece of 3/4-inch plywood for the bottom panel. This panel should fit snugly inside the area created by the top, front, and side panels. Using a miter saw will help you achieve clean, precise 45-degree cuts on the corners of the top and front panels if you want a seamless “waterfall” edge, but straight butt joints are easier for beginners and still look great. Double-check all measurements before making any cuts.

Step 4: Assemble the Bench Box
Now you will wrap the support frame with the panels you just cut, creating the hollow box. Start by laying the top panel upside down on a flat work surface. Apply a generous amount of wood glue along the top edges of the front and side panel pieces. Carefully position them against the top panel, using clamps to hold them securely in place.
Check that your corners are square. Once clamped, drill pilot holes and use 1 1/4-inch screws to fasten the panels together from the inside where they won’t be seen. If you prefer a completely clean look with no visible fasteners, you can rely on wood glue and clamps alone, but allow for a much longer drying time. This assembly will form a three-sided shell that will later slide over the wall-mounted support frame.
Step 5: Prepare for Mounting
Before you can attach the support frame to the wall, you need to prepare it for the mounting hardware. Lay the 2×4 frame on the floor and mark the locations where it will align with the wall studs you found earlier. At each of these marks, drill a pilot hole through the back of the frame that is slightly smaller than the diameter of your lag screws.
This prevents the wood from splitting when you drive the screws in. It’s also a good idea to use a larger drill bit to countersink the holes slightly, allowing the head of the lag screw to sit flush or just below the surface of the wood. This ensures the bench’s bottom plywood panel will fit flat against the frame later on.
Step 6: Mount the Frame to the Wall
This is the most important step for ensuring your bench is safe and secure. Hold the support frame against the wall at your desired height. Use a level to make sure it is perfectly horizontal. Once you are satisfied with the position, use your pencil to mark the wall through the pilot holes you drilled in the frame.
Set the frame aside and drill pilot holes into the wall studs at your marks. Now, reposition the frame on the wall, align it with the holes, and drive the lag screws through the frame and into the studs. Use an impact driver or a socket wrench to tighten them fully. The frame should feel completely solid and immovable. Pull on it firmly to test its strength before proceeding.

Step 7: Attach the Bench Box
With the support frame securely mounted, you can now install the outer box. Apply a generous amount of wood glue to the top and front surfaces of the wall-mounted 2×4 frame. Carefully slide the three-sided bench box you assembled earlier over the frame. It should be a snug fit. Press it firmly against the wall, ensuring the edges are flush.
You can use a few finish nails or brads, driven in at an angle from the underside or top, to hold the box in place while the glue dries. If you have long clamps, you can also use them to hold the box tight to the frame. The combination of wood glue and a tight fit will create a very strong bond.
Step 8: Install the Bottom Panel
The final piece of the structure is the bottom plywood panel. This panel encloses the bench and adds to its rigidity. Apply a bead of wood glue along the bottom edges of the mounted 2×4 frame and the front and side panels. Carefully lift the plywood panel into place and press it firmly.
Secure it by driving 1 1/4-inch screws up through the plywood and into the 2×4 frame. Space the screws every 8-10 inches around the perimeter for a secure attachment. This bottom panel hides the internal frame and mounting hardware, completing the floating illusion.

Step 9: Fill, Sand, and Finish
Now for the finishing touches that will make your bench look professional. Use wood filler to fill any screw holes, nail holes, or small gaps in the joints. Once the filler is dry, sand the entire surface of the bench. Start with medium-grit sandpaper (around 120-grit) to smooth out any rough spots and flush up the joints. Then, move to a fine-grit sandpaper (220-grit) to get a silky-smooth surface.
Wipe away all the sanding dust with a tack cloth or a damp rag. Now you can apply your chosen finish. Whether you’re using stain, paint, or a clear polyurethane sealant, apply it in thin, even coats, following the manufacturer’s instructions. Allow ample drying time between coats and lightly sand with fine-grit sandpaper if needed.
Step 10: Final Inspection and Use
Once the finish is completely cured (this can take 24-72 hours), give your new bench a final inspection. Check for any rough spots or imperfections that may need a touch-up. Clean the bench and the surrounding area. Finally, it’s time to test it out.
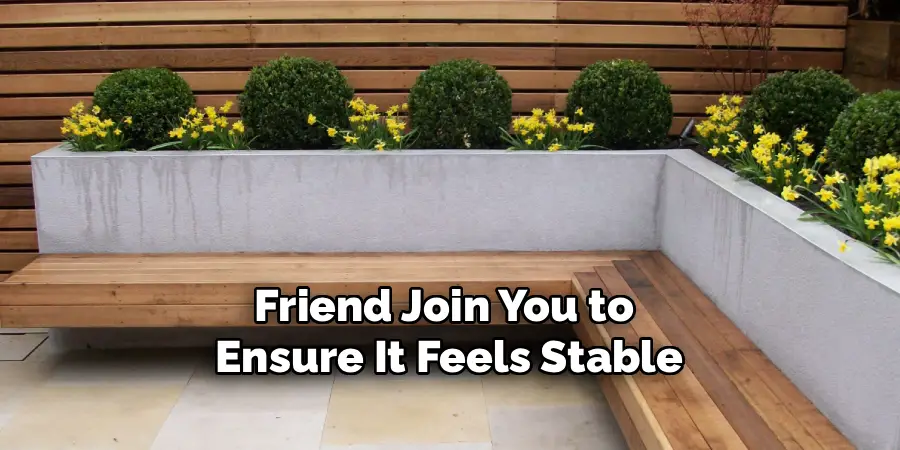
Sit on the bench gently at first, then with your full weight. You can even have a friend join you to ensure it feels stable and secure. Once you are confident in its strength, your floating bench is ready to be used and admired. Step back and enjoy the results of your hard work—a beautiful, functional, and custom-built piece of furniture.
Conclusion
How to build a floating bench is a fantastic DIY project that adds a touch of custom craftsmanship and modern elegance to your home.
By following these steps carefully, you can create a sturdy, stylish, and functional piece of furniture that perfectly suits your space. The process is not only about building a bench but also about gaining the satisfaction of making something with your own hands.
So gather your tools, choose your wood, and get ready to transform a simple wall into a beautiful and practical focal point.