Have you ever been in the middle of a project only to be interrupted by an uncomfortable office chair? It might not seem like it would make a difference, but the gas lift is one common culprit behind sore muscles and general discomfort at work.
You may even feel as though your productivity slows down when dealing with an unsupportive sitting position due to incorrect adjustments. Removing the gas lifts from your office chair is relatively easy and can make all the difference in creating a comfortable space for working. Keep reading on to find out how to remove gas lift from office chair!
Can You Replace the Gas Lift in Office Chair?
Replacing the gas lift in your office chair is possible, but you may need to seek help from a professional.
The process of replacing the gas lift involves removing and disassembling the existing gas lift cylinder, measuring for the correct size replacement part, obtaining the necessary tools and equipment, carefully installing the new part and ensuring that it fits together properly, and then reassembling the chair.
It may be easier to purchase an entirely new chair rather than replace the gas lift in your existing office chair.
It is important to take safety precautions when attempting to replace a gas lift cylinder in an office chair, as the process involves dealing with heavy parts that can cause serious injury if not handled correctly. Be sure to wear protective eyewear and gloves for added protection.
Additionally, always read and follow any instructions provided before starting any project or task like this one.
If you decide to replace the gas lift on your own, it can help to have references available such as diagrams, manuals or videos of how-to guides that show how to complete the replacement process safely and correctly.
It is also recommended to shop around for the best price on the replacement part and tools required and be sure to check if any warranties are included with the purchase of a new gas lift cylinder or office chair before finalizing your purchase.
Replacing a gas lift in an office chair is not as complicated as it may seem, but it is important that you take all necessary precautions to ensure proper installation. With a little preparation and effort, you can replace your office chair’s gas lift safely and securely.
10 Methods How to Remove Gas Lift from Office Chair
1. Check the Manufacturer’s Instructions
If you have a gas lift office chair, the first thing you should do when trying to remove the gas lift is to check the manufacturer’s instructions. Many chairs come with specific instructions on how to remove the gas lift, and following these instructions will make the process much easier.
If you don’t have a copy of the instructions, check the manufacturer’s website for download options. To safely remove the gas lift, make sure to follow the manufacturer’s guidelines. However, it is important to note that the gas lift is designed to be a permanent part of the chair and should not be removed without following the manufacturer’s direction.
2. Use a Screwdriver
In most cases, the gas lift can be removed from an office chair using a screwdriver. Simply locate the screws that are holding the gas lift in place and use the screwdriver to loosen and remove them. Once the screws are removed, the gas lift should come right off. It may be necessary to use a pair of pliers to remove the gas lift if it is stuck in place.
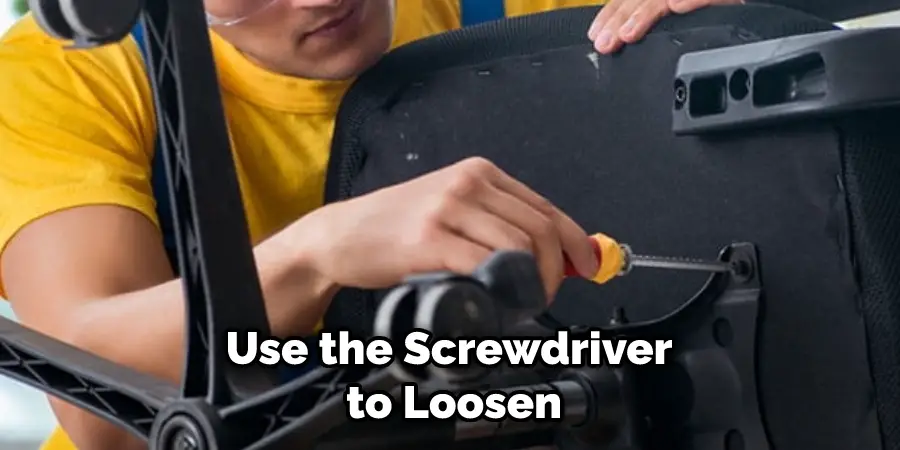
Be sure to use caution when doing this so that you do not damage the chair or gas lift. Although it may seem simple, always make sure to read the manufacturer’s instructions before attempting this task. Doing so can help ensure that you do not make any mistakes that could potentially harm the chair.
3. Use Pliers
If you are having difficulty removing the screws with a screwdriver, you may need to use pliers. Place the jaws of the pliers over one of the screws and apply pressure until it loosens. Once the first screw is loose, you should be able to remove all of them by hand. After the screws have been removed, you can pull out the gas lift and discard it.
Once you have done this, you can begin to install the new gas lift. Make sure the new lift is securely in place before reattaching the screws to secure it. To reinstall the gas lift, simply follow the same steps in reverse.
4. Use WD-40
If the screws are particularly stubborn, you may need to use WD-40 or another lubricant to loosen them. Simply spray a small amount of WD-40 onto each screw and let it sit for a few minutes before attempting to remove them again. Be sure to use protective gloves when handling WD-40, as it is a powerful lubricant that can cause skin irritation.
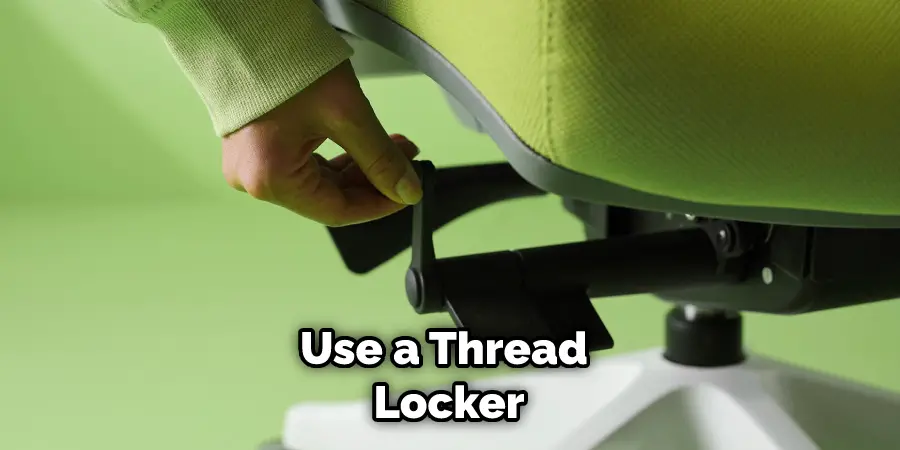
However, be sure to remove any excess WD-40 with a cloth before reassembling the gas lift, as it can cause damage to the chair. To ensure the gas lift is secured and doesn’t come loose, it is recommended to use a thread locker on each of the screws.
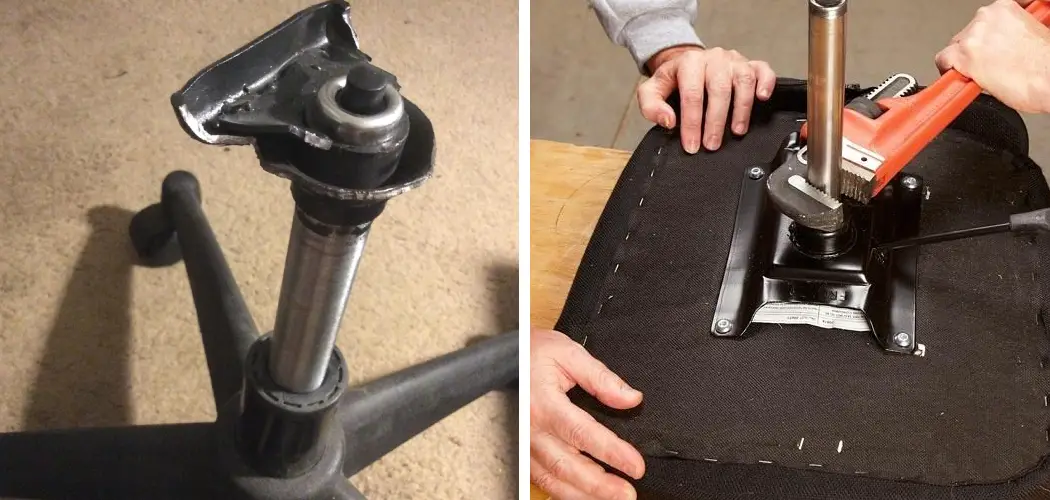
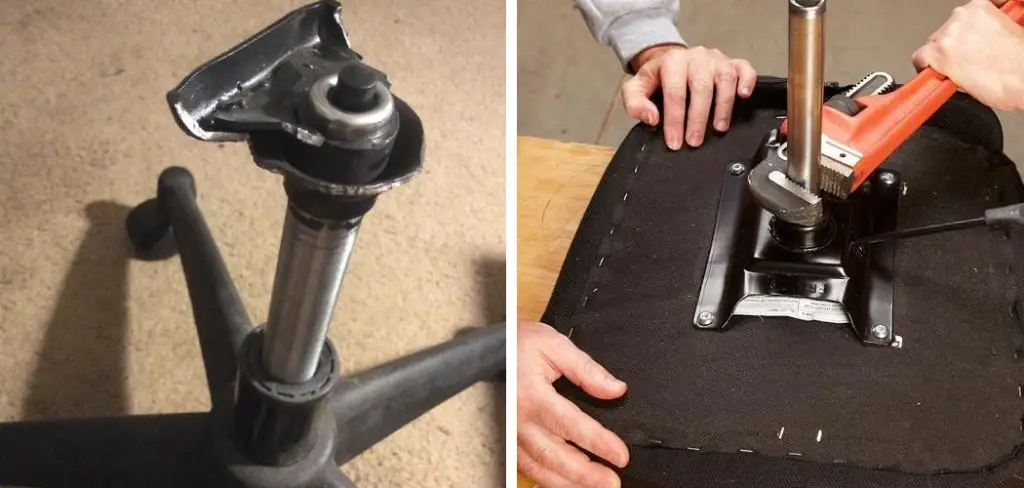
5. Pull Up on the Gas Lift
Once all of the screws have been removed, you should be able to simply pull up on the gas lift and remove it from the chair. If it is stuck, you may need to use a flathead screwdriver or something similar to pry it loose. Be careful not to damage the gas lift or other components of the chair while doing this. Finally, you can now replace the gas lift with a new one.
Make sure to install the screws in the same way they were removed to ensure a secure fit. Now your office chair should have a new and improved gas lift, and you can enjoy sitting in it for hours without worry!
6. Remove any Remaining Parts
Once the gas lift has been removed from the chair, there may be some remaining parts that need to be removed as well. These parts may include washers, nuts, or bolts. Simply remove these parts by hand or with a screwdriver until they are all gone.
Once these parts are removed, the chair is ready to be reassembled. While reassembling the chair, be sure to take special care when reconnecting the gas lift to ensure that it is properly secured in place. Once everything is put back together, the chair should be ready to use.
7. Clean Up Any Messes
Once all of the parts have been removed, you will likely be left with some grease or other messes on both the chair and your hands. Be sure to clean up any messes before proceeding further.

Use a cloth and cleaning solution to wipe down the chair, as well as wash your hands with soap and water. This will ensure that no dirt or grime gets into the new parts you will be putting into your office chair. After everything is cleaned, you can proceed to the next step of installing the new gas lift.
8. Replace any Damaged Parts
If any of the parts that you removed during this process were damaged, now is the time to replace them. You can purchase replacement parts from most hardware stores or online retailers. Make sure to measure the parts that you need with a ruler or measuring tape.
Although it can take some time to find the exact parts, it will be worth it in the long run. Make sure that you read all installation instructions for the new parts before attempting to replace them. With the right tools, this process should be relatively straightforward.
9. Install the Replacement Parts
Once you have purchased any replacement parts, you can begin to install them. Be sure to follow any instructions that come with your new parts for proper installation procedures. If you do not have any new parts, you may be able to reuse the old ones.
Clean and inspect any old parts before re-installing them and make sure that they are functioning properly. Once the parts are in place, move on to the next step.
10. Test the Chair for Stability
Once all of the parts have been installed, it is important to test the chair for stability before using it again. Simply sit in the chair and make sure that it feels secure and stable before getting up and moving on to other tasks. If the chair feels wobbly or off-balance, make sure to further adjust it until it is secure and safe to use.

With a little bit of effort, the gas lift on an office chair can be easily removed or adjusted.
Conclusion
Overall, removing a gas lift from an office chair is quite simple, however, it is important to be aware of the safety rules and to understand each step of the removal process. Don’t hesitate to contact qualified professionals if needed! We hope you found this guide useful and have successfully removed your own gas lift from your office chair.
Now it’s time to take up our call to action: use these instructions when you need to know how to remove gas lift from office chair. Good luck!