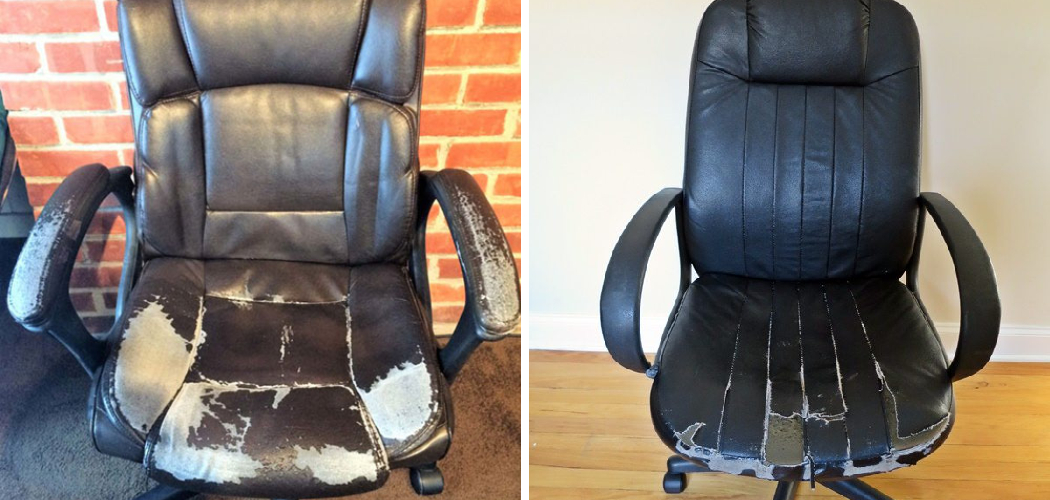
If your office chair is looking a little worse for wear, or you’re just bored of the current look, why not give it a makeover? Reupholstering an office chair is a great way to rejuvenate it and give it a new lease of life.

It can be a little daunting to take on this project yourself, but with a few simple steps, you can have a brand new office chair in no time. In this tutorial, we’ll show you how to reupholster an office chair with arms using some basic tools and supplies. Let’s get started!
How Do You Reupholster a Chair with Padded Arms?
- Start by removing the existing upholstery from the chair. Begin by taking off the arms, which should be secured with screws or bolts; you’ll need a screwdriver for this part. Once you’ve removed the arms, peel back the fabric and batting to reveal any staples beneath them.
- Use pliers to remove any staples that are holding the old fabric in place and carefully pull away all of the material until it is completely stripped from the frame. Be sure to inspect underneath for any extra padding that may have been added previously and remove it as well.
- Measure your new fabric against your chair’s frame to determine how much you will need – make sure to factor in an additional couple of inches for the seams. Cut your fabric to size and lay it out over the frame.
- Starting from one end, use a staple gun to attach the fabric to the underside of the chair’s frame. Slowly work your way around in sections, stretching and smoothing as you go until all of the fabric is secured in place.
- To reattach the arms, first add any extra padding that you removed earlier before securing them back in place with screws or bolts, using a screwdriver for this part.
10 Methods How to Reupholster an Office Chair with Arms
1. Remove the Old Fabric
The first step in reupholstering an office chair is to remove the old fabric. Use a screwdriver to remove the staples that are holding the fabric in place. Be careful not to damage the wood of the chair as you remove the staples. If you have an upholstery tool, use it to help remove the staples. Although it’s not a must, it will make the process go much faster.
2. Cut New Fabric
Once the old fabric has been removed, you will need to cut new fabric to cover the chair. The best way to do this is to lay the new fabric over the old fabric and trace it around it with a pencil. Then, cut out the new fabric along the pencil line.
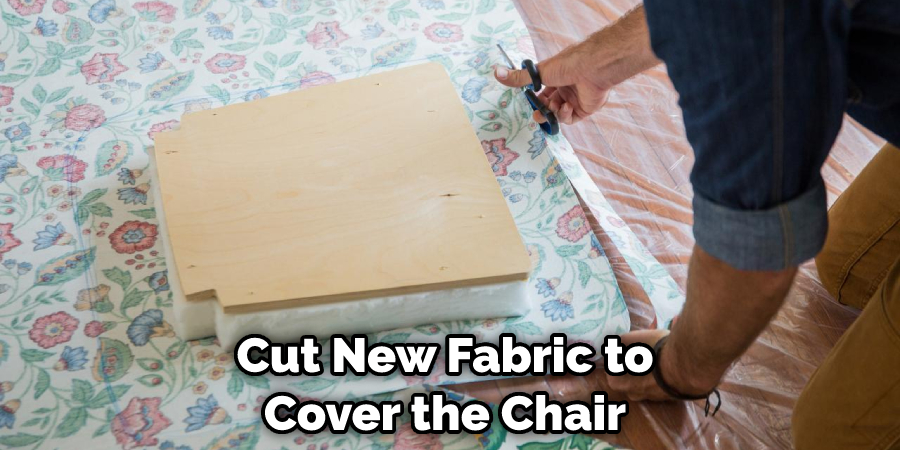
However, you should always add a few extra inches when cutting the fabric to provide some seam allowance. Make sure to also measure and cut a piece of fabric for the arms.
3. Attach New Fabric
Now that you have cut out the new fabric, it’s time to attach it to the chair. Start by attaching one side of the fabric to the back of the chair with staples. Then, stretch the fabric tight and attach it to the other side of the chair.
Finally, attach the fabric to the front of the chair. If you have any excess fabric, trim it off with scissors. Although this will create a neat and professional look, it is not necessary.
4. Add Foam Padding
If you want your office chair to be extra comfortable, you can add foam padding before you reattach the new fabric. Cut out a piece of foam that is slightly smaller than the piece of fabric you just attached.
Then, place the foam on top of the fabric and staple it in place. Try to make the padding even and smooth. Although this will make the chair extra comfortable, it is not necessary.
5. Trim Excess Fabric
Once you have attached all of the new fabric, you will need to trim away any excess material. Use scissors to carefully trim away any excess fabric from around the edges of the chair. Be sure not to cut into any of the newly upholstered areas! While this step is important to create a neat and professional look, it is not necessary.
6. Reattach Arms
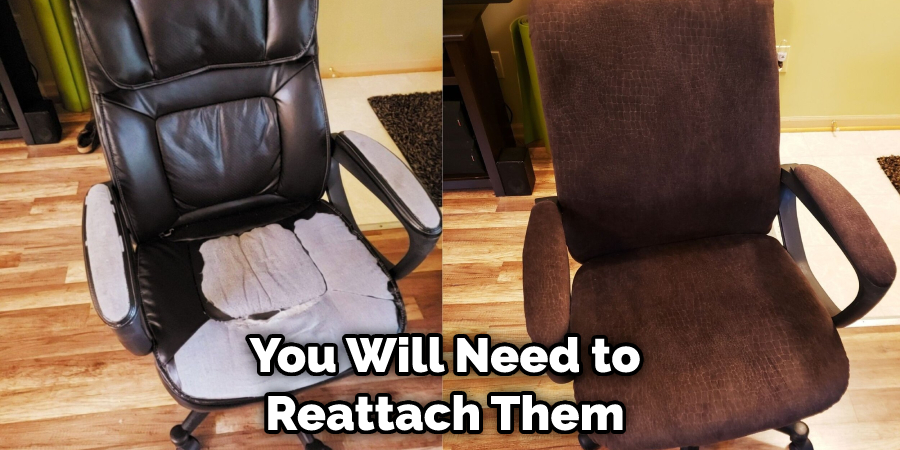
If your office chair has arms, you will need to reattach them at this point. Use screws or nails to reattach the arms to their original positions on either side of the chair. If necessary, add any extra padding to the arms before reattaching them. Keep in mind that this step may vary slightly depending on the chair.
7. Add Decorative Details
If you want, you can add some decorative details to your newly upholstered office chair. For example, you could add piping around the edges of the seat or backrest for a professional look. Or, you could add buttons or tufting for a more elegant look.
If you choose to add these decorative details, make sure to complete them before you reattach the arms. Although this step is not necessary, it will give your chair a more polished look.
8. Add Chair Cover
If you want to protect your newly upholstered chair, you can add a slipcover or dust cover on top of the fabric. Choose a color and material that matches your office decor for the best look.
If necessary, add some padding or batting to the underside of the cover before attaching it with staples. Although this step is not necessary, it will help protect your chair from dirt and spills.
9. Enjoy Your New Chair!
Once you have finished reupholstering your office chair with arms, it’s time to enjoy your new piece of furniture! Place it in an area where you can relax and take in its beauty.
With proper care and maintenance, your chair should last for many years to come. While upholstering an office chair with arms may seem like a daunting task, it is actually quite easy when you follow the correct steps.
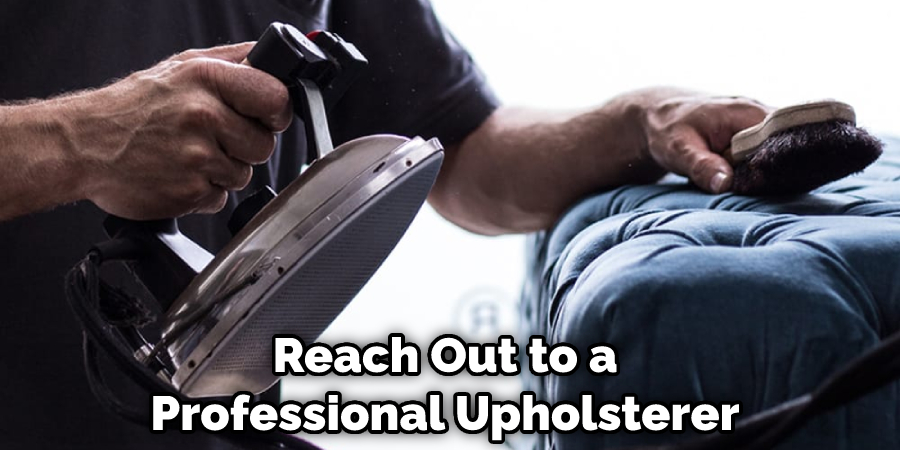
10. Get Professional Help:
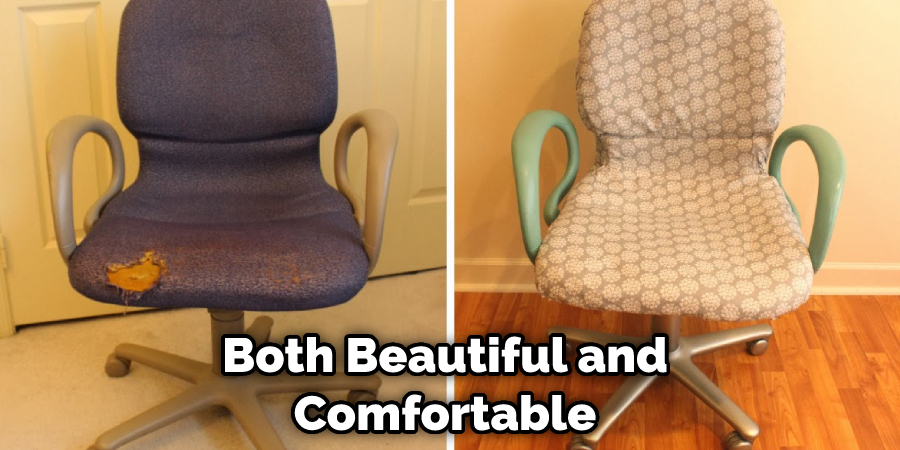
If this all seems overwhelming, don’t worry. Some professionals specialize in reupholstering furniture. Reach out to a professional upholsterer for help if you need it.
With their expertise, they can turn your chair into something that is both beautiful and comfortable. If you choose to go this route, make sure to shop around and read reviews to find the best upholsterer for your needs.
By following these steps, you can easily and quickly reupholster your office chair with your arms. With the right fabric and tools, you can transform an old, outdated chair into something new and beautiful.
Although this project may sound difficult at first, it is actually quite simple when you follow the correct steps. And, with a little effort and patience, you can have a brand new office chair in no time!
You Can Check It Out Get Rid of Old Office Chairs
Things to Consider when Reupholster an Office Chair with Arms
- Choose the Right Fabric: Make sure to choose a fabric that is both durable and stylish. Consider your office’s decor when selecting the material for the best results.
- Cut Evenly: When cutting out pieces of fabric, make sure to cut evenly. This will help ensure that all of your upholstery looks neat and professional.
- Trim Excess Material: After attaching the fabric, use scissors to trim away any excess material from around the edges of the chair.
- Reattach Arms: Use screws or nails to reattach any arms that were removed previously. Be sure not to add any extra padding before reattaching them!
- Add Decorative Details: If desired, add some decorative details such as piping, buttons, or tufting to the chair. This step is not necessary but can help give it a more polished look.
- Add Chair Cover: To protect your newly upholstered chair from dirt and spills, consider adding a slipcover or dust cover on top of the fabric.
- Enjoy Your New Chair: With some patience and effort, you can have a brand new office chair in no time! Sit back and enjoy it for many years to come!
- Get Professional Help: If you need help reupholstering your office chair with arms, reach out to a professional upholsterer for assistance. They can turn your old and outdated furniture into something new and beautiful.
You Can Check It Out Replace Ball Bearings in a Swivel Chair
Conclusion
Now that you know how to reupholster an office chair with arms, it’s time to get started! Choose your fabric carefully, taking into account both style and durability. Once you’ve determined the size of the piece you need, cut it to fit using a rotary cutter or scissors.
Remember to stay within the 1/2-inch seam allowance as you sew around the curves of the chair. If you run into any trouble along the way, don’t hesitate to ask for help from a friend or family member. With a little effort (and a lot of patience), you’ll have a brand-new office chair that looks great and provides years of comfort.