
A BenQ monitor can look great right out of the box, but factory settings are not always ideal for your room, your work, or your eyes. Colors may look too cool, brightness may feel harsh, and shadows may hide important details. If you edit photos, design graphics, watch movies, play games, or work long hours, small display changes can make a big difference.
Learning how to calibrate benq monitor helps you get more accurate colors, better contrast, and a more comfortable viewing experience. You do not need to be a tech expert to do it. With the right settings and a simple process, you can improve your screen in less than an hour.
This guide walks you through each step in a clear, beginner-friendly way. You will learn how to prepare your workspace, adjust monitor settings, use built-in tools, and check your results so your display looks balanced and natural.
Why Benq Monitor Calibration Matters
BenQ monitor calibration matters because every screen displays color, brightness, and contrast a little differently. Even two monitors from the same brand can look different due to panel type, age, lighting, and factory presets.
Good calibration helps make colors more accurate and consistent. This is important for photo editing, video work, design, printing, gaming, and everyday browsing. It also reduces eye strain because the screen is not too bright or too blue for your room.
Calibration can also help you see more detail in dark and bright areas. Instead of guessing whether your display looks right, you create a balanced setup that matches your space and purpose.
Step-by-Step Guide To How To Calibrate Benq Monitor
Step 1: Prepare Your Room Lighting
Start by setting up the room where you normally use your monitor. Calibration works best when your lighting is stable and comfortable. If you calibrate the screen in bright sunlight but use it at night, the results may not feel right.
Try to avoid direct light hitting the screen. Reflections can make colors and contrast harder to judge. Close curtains if needed, dim harsh lamps, and use soft room lighting.
Before you begin how to calibrate benq monitor, decide on the lighting you use most often. Your goal is not a perfect lab setup. You simply want a consistent environment that helps your eyes judge the screen more accurately.

Step 2: Let The Monitor Warm Up
Turn on your BenQ monitor and let it run for at least 20 to 30 minutes before making changes. Monitors can shift slightly in brightness and color during the first few minutes after powering on.
This warm-up time helps the display reach a stable state. If you adjust settings too early, the screen may look different later, and your calibration may feel off.
Use this time to open a few familiar images, documents, or websites. Choose content you know well, such as a portrait, a colorful photo, and a page with black text on a white background. These examples will help you compare changes as you adjust the display.
Step 3: Reset The Monitor Settings
If you have changed many settings before, start with a reset. This gives you a clean baseline and removes old adjustments that may be causing strange colors or poor contrast.
Open the monitor’s on-screen display menu using the buttons or joystick on the monitor. Look for a system, settings, or reset option. The exact name may vary by model, but most BenQ monitors include a reset feature.
After resetting, choose a standard or sRGB picture mode if available. These modes are usually more balanced than vivid, game, movie, or low blue light modes. You can still fine-tune the display after selecting a stable starting point.
Step 4: Set The Correct Brightness
Brightness is one of the most important settings for comfort and accuracy. Many monitors are too bright by default, which can cause eye strain and make images look washed out.
Open a white document or webpage. The screen should look like paper under your room lighting, not like a glowing light source. If it feels harsh, lower the brightness. If it looks dull or gray, increase it slightly.
For many indoor spaces, a brightness setting between 20% and 50% works well, but your room may need something different. Trust comfort first. A well-calibrated monitor should feel easy to view for long periods, not overly intense.
Step 5: Adjust Contrast And Black Levels
Contrast controls the difference between dark and bright areas. If contrast is too high, bright details may disappear. If it is too low, the image may look flat and dull.

Use a test image or a black-to-white gradient if you have one. You should be able to see detail in shadows without making black areas look gray. You should also see detail in bright areas without turning whites into a harsh glare.
Most BenQ monitors work well with the default contrast setting, often near 50 or the factory value. Make small changes only. Large contrast adjustments can quickly create color shifts and reduce image quality.
Step 6: Choose The Right Color Temperature
Color temperature controls whether your screen looks warm, neutral, or cool. A cool display may look bluish, while a warm display may look yellow or reddish.
For general use, a setting near 6500K is a common target because it looks neutral in many rooms. Some BenQ monitors may label this as normal, neutral, or 6500K. If your work involves photography, design, or video, this is often a strong choice.
If you use the monitor mostly at night, a slightly warmer setting may feel more comfortable. Still, avoid making the screen too warm if color accuracy matters. The goal is a natural white that does not lean too blue or too yellow.
Step 7: Use Software Or A Calibration Tool
Your operating system includes basic calibration tools that can guide you through gamma, brightness, contrast, and color balance. Windows has Display Color Calibration, while macOS includes display calibration options in system settings. These tools are helpful for beginners and can improve a poorly tuned screen.
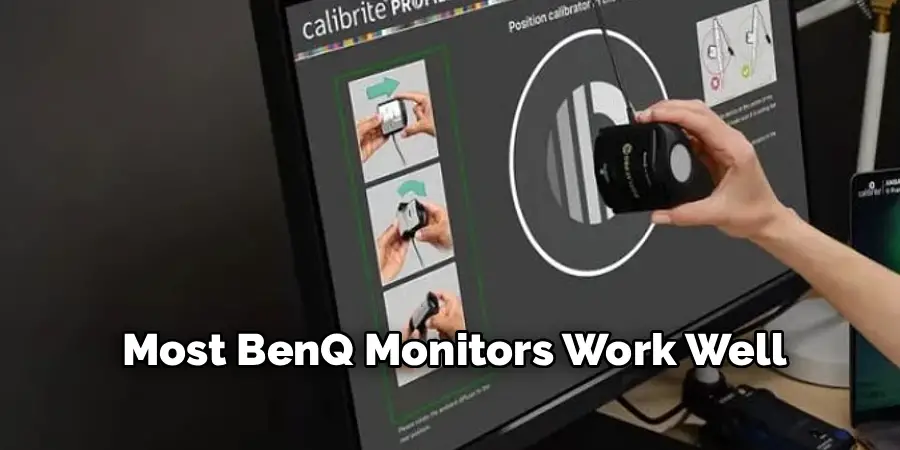
For more accurate results, use a hardware colorimeter. This device sits on the screen and measures color directly. It then creates a profile for your monitor.
If you are serious about how to calibrate benq monitor for photo editing, print work, or professional design, a hardware tool is the best option. It removes guesswork and gives more reliable results than judging by eye alone.
Step 8: Save, Compare, And Recheck
After making changes, save your settings if your monitor allows it. Some BenQ models let you store custom picture modes, which is useful if you switch between work, gaming, and evening use.
Compare your calibrated view with familiar images. Skin tones should look natural, whites should not look blue or yellow, and dark areas should still show detail. If something feels wrong, make small changes instead of starting over.
Recheck your monitor every month or two. Displays can change over time, and your room lighting may change with the seasons. Regular checks help keep your screen consistent. You do not need to recalibrate daily, but a quick review keeps your setup reliable.
Frequently Asked Questions
How Often Should I Calibrate My BenQ Monitor?
For normal home or office use, calibrating every two to three months is usually enough. If you do color-sensitive work like photo editing, video grading, or print design, monthly calibration is better. Monitors slowly change as they age, and room lighting can also shift. Regular calibration keeps your display more consistent and helps you avoid making editing decisions based on inaccurate color.
Do I Need A Hardware Calibrator?
You do not need a hardware calibrator for basic improvements, but it gives better results. Built-in software tools can help adjust brightness, contrast, gamma, and color balance by eye. A hardware calibrator measures the screen directly, which is more accurate. It is worth buying if you edit photos professionally, prepare files for print, or need consistent color across multiple displays.
Which Picture Mode Is Best For Calibration?
The best starting point is usually sRGB, standard, or custom mode. These modes tend to be more neutral than vivid, game, cinema, or low blue light presets. Special modes can boost contrast, saturation, or warmth, which may look appealing but reduce accuracy. After choosing a stable mode, adjust brightness, contrast, and color temperature to match your room and viewing needs.
Why Does My Monitor Look Different After Calibration?
Your monitor may look different because calibration often removes exaggerated brightness, contrast, or color saturation. At first, accurate settings can seem less dramatic than factory presets. Give your eyes time to adjust before changing everything back. If the screen still looks wrong after a day, check your brightness, color temperature, and display profile. A small correction may solve the issue.
Can I Calibrate Multiple Monitors The Same Way?
You can use the same basic process, but each monitor needs its own settings and profile. Even matching BenQ monitors can show slight differences in brightness, color, and contrast. If you use two screens together, calibrate them in the same room lighting and set similar brightness levels. A hardware calibrator is especially helpful when matching multiple monitors for work.
Conclusion
Calibrating a BenQ monitor is a simple way to improve color accuracy, viewing comfort, and image detail. Start with stable room lighting, let the screen warm up, reset old settings, and choose a balanced picture mode. Then adjust brightness, contrast, color temperature, and software profiles with care.
If you only use your monitor for everyday tasks, basic manual calibration can make the screen look much better. If you do creative or professional work, a hardware calibrator gives more dependable results.
Now that you know how to calibrate benq monitor, take a few minutes to check your display settings and make small, careful changes. A balanced screen helps your work look better and makes daily viewing easier on your eyes.
