

There’s something deeply satisfying about sitting in a chair you made with your own hands. Rattan weaving is one of those crafts that looks complicated from the outside but becomes surprisingly manageable once you understand the basics. Whether you’re restoring a vintage piece or starting a brand-new project, learning how to weave a rattan chair is a skill worth picking up.
Rattan has been used in furniture making for centuries. It’s lightweight, flexible, and naturally strong — which makes it perfect for chair seats and backs. The weaving process involves threading strips of rattan through a frame in a structured pattern to create a tight, durable surface.

This guide walks you through everything you need to know. We’ll cover the benefits of rattan weaving, the supplies you’ll need, a detailed step-by-step process, common mistakes to avoid, and answers to the questions beginners ask most often.
What Will You Need?
Gathering your supplies before you start saves a lot of frustration mid-project. Here’s what you’ll need:
- Rattan cane or reed — sold in spools or pre-cut lengths; choose a width appropriate for your chair (common sizes range from 2mm to 6mm)
- A chair frame — either a new unfinished frame or an old chair with the old weaving removed
- A bucket of warm water — for soaking the rattan to make it pliable
- Clamps or pegs — to hold rattan strips in place while you work
- A weaving awl or bodkin — a pointed tool for threading rattan through tight spaces
- A sharp utility knife or scissors — for trimming ends cleanly
- A mallet or hammer — for tapping pegs into place if your frame has peg holes
- Sandpaper — to smooth any rough edges on the frame before you begin
- Wood stain or varnish (optional) — if you want to refinish the frame as part of the project
- Tape measure — to plan your spacing accurately
Make sure you buy at least 20% more rattan than you think you need. Waste from trimming and the occasional mistake adds up quickly, and running out mid-project is frustrating.
10 Easy Steps on How to Weave a Rattan Chair
This is the heart of the guide. Take your time with each step, and don’t rush the process. Rattan weaving rewards patience.
Step 1: Prepare the Chair Frame
Before any weaving begins, your frame needs to be clean, smooth, and structurally sound. If you’re working with an old chair, remove all the old cane or rattan completely. Use a utility knife to cut away the old weaving and a narrow tool to poke out any cane trapped in the holes or grooves.
Once the frame is clear, inspect it carefully. Look for cracks, loose joints, or damaged wood. Repair any structural issues now — it’s much harder to fix them once weaving is underway. Sand the frame lightly with medium-grit sandpaper, paying extra attention to the edges around the seat opening where rattan will make contact. Sharp edges can cut through the cane over time, so smooth them thoroughly.
If you want to refinish the frame, apply your stain or varnish now and let it dry completely before moving on. A well-prepared frame gives your weaving a solid foundation and extends the life of the finished chair.

Step 2: Soak the Rattan
Dry rattan is stiff and brittle. Trying to weave with it in that state will cause it to crack or split, ruining both the material and your progress. Soaking transforms it into a flexible, workable material that bends without breaking.
Place your rattan strips in a bucket or tub of warm water. Let them soak for 20 to 30 minutes. You’ll notice them becoming noticeably softer and more pliable as they absorb the water. Don’t soak them too long — oversaturated rattan can become mushy and lose its structure.
Work with small batches at a time. As you weave, the rattan will gradually dry and tighten, which is exactly what you want — it creates a firm, taut surface. Keep a damp cloth nearby to re-moisten pieces if they start to stiffen before you’ve finished threading them through.
Step 3: Measure and Mark Your Starting Points
Consistent spacing is what separates a professional-looking result from a messy one. Before you thread a single strand, take time to plan your layout.
Measure the total width and depth of your seat opening. Count the number of holes or pegs around the frame if your chair has them, or mark evenly spaced points along the edge with a pencil if you’re working with a grooved frame. Aim for spacing between 10 mm and 15 mm depending on the size of your cane and the look you want.
Mark the center point on each side of the frame. You’ll start your weaving from the center and work outward — this ensures your pattern stays symmetrical. Taking a few extra minutes here prevents a lopsided pattern that becomes obvious only once you’re halfway through.
Step 4: Begin the First Vertical Layer
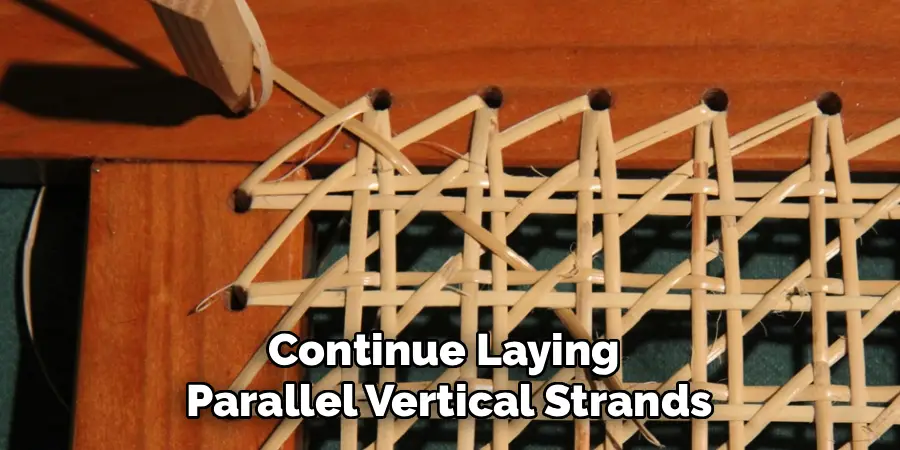
Now the actual weaving begins. Thread your first strand of soaked rattan from the back center hole (or marked point) to the front center, pulling it straight across the frame. Leave about 3 inches of excess on the starting end and secure it temporarily with a clamp or peg.
Continue laying parallel vertical strands, working from the center outward to the right, then repeat on the left side. Keep each strand snug but not so tight that it distorts the frame. The goal is even, consistent tension across all strands.
At each end, loop the rattan through the hole or around the peg and bring it back in the opposite direction to start the next strand. If you run out of a length mid-row, overlap the new piece with the old one by at least two holes and secure both ends firmly before continuing.
Step 5: Lay the Horizontal Layer
Once your vertical strands are in place, you’ll add a horizontal layer directly on top of them — not woven through yet, just laid across. This second layer runs from one side of the frame to the other, perpendicular to the first.
Follow the same process: start at the center, work outward in both directions, maintain even tension, and secure each end as you go. The two layers sitting on top of each other form a grid pattern that will become the base of your weave.
Keep checking that your strands are straight and parallel. It’s easy for them to drift slightly, especially at the edges. Adjust as needed before moving on, because misaligned strands will multiply into a visible problem in the later layers.
Step 6: Add the Second Vertical Layer
With your grid in place, you now add a second set of vertical strands, running parallel to the first but offset very slightly — typically placed just to the right of each original vertical strand. This second vertical pass is what starts to lock the horizontal strands in place.
Thread this layer over the horizontal strands rather than lying flat like the first vertical pass. The slight offset creates the classic rattan weave pattern and begins to add structural rigidity to the seat. Use your weaving awl to help thread the cane through tight spots where the layers overlap.
Take your time with this step. The tension here is important — too loose, and the weave will sag; too tight and the frame may warp. Aim for strands that are firm but still have a very slight give when pressed.
Step 7: Weave the Second Horizontal Layer
This is where the pattern really starts to come to life. The second horizontal layer is woven through the vertical strands — going over and under in an alternating pattern rather than simply resting on top.
Thread your soaked rattan from one side of the frame, and as you cross each vertical strand, alternate between passing over and under. This interlocking action is what creates the structural integrity of the seat. If you went over a vertical strand, the next horizontal row should go under it, and vice versa — this is the standard checkerboard or basket-weave pattern.
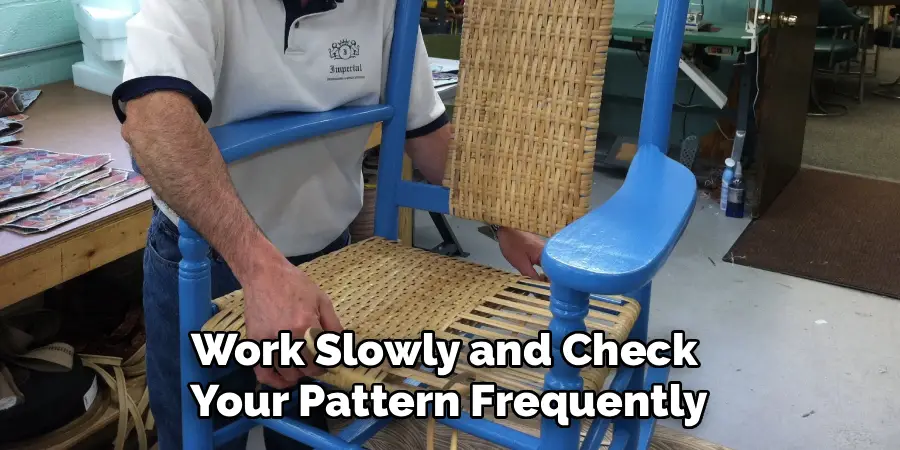
Use your awl to lift individual strands and guide the cane through. Work slowly and check your pattern frequently. A single wrong pass can throw off the symmetry of an entire row, and it’s much easier to fix a mistake immediately than to backtrack several rows later.
Step 8: Add the Diagonal Layers
Once the four-layer base is complete, you add two diagonal layers — one running from bottom-left to top-right, and one running from bottom-right to top-left. These diagonals weave through the existing grid and dramatically increase the strength and visual complexity of the seat.
Start a diagonal strand at a corner and weave it through the existing layers, passing over pairs of strands and under pairs in a consistent pattern. The diagonal layers interlock with everything beneath them, pulling the entire structure together.
This step requires the most patience. The existing strands are now packed tightly, and threading new cane through them takes effort. Keep your rattan well-moistened and use your awl frequently. Don’t force the cane — if it’s resisting, recheck your path to make sure you’re following the correct over-under sequence.
Step 9: Secure and Trim the Ends
With all your weaving layers complete, go around the entire seat and pull each end snug. Any temporary clamps or pegs used to hold starting ends can now be removed, and those loose ends need to be locked in permanently.
Thread each loose end back under two or three adjacent strands on the underside of the seat. This tucks them out of sight and holds them securely without the need for glue or knots. Once the rattan dries fully, it will tighten even further, and these ends won’t budge.
Use your utility knife or scissors to trim any remaining excess flush with the frame. Be careful not to cut strands that are part of the weave — work slowly and check each cut before you make it. The underside of the seat should look neat and tidy when you’re done.
Step 10: Apply the Binding and Finish the Chair
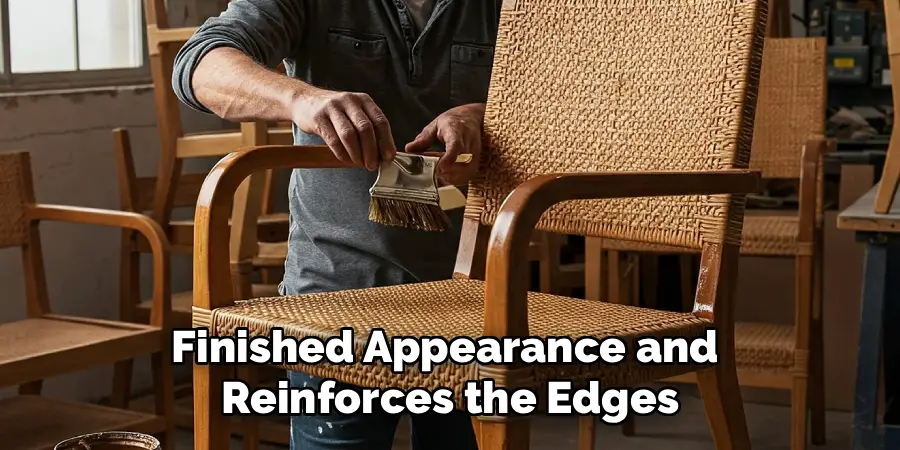
The final step is adding the binding — a wider strip of rattan that runs along the outer edge of the seat, covering the points where individual strands enter the frame. This binding gives the chair a polished, finished appearance and reinforces the edges.
Soak a wider piece of rattan (typically 6mm or wider) and lay it around the perimeter of the seat. Use a thinner strand to lace the binding strip down by threading it through the existing holes at regular intervals, forming a neat stitch along the border.
Once the binding is secure, allow the entire seat to dry completely — usually 24 to 48 hours in a well-ventilated area. As it dries, the rattan will contract and tighten, firming up the whole surface. You can apply a light coat of linseed oil or rattan-specific sealant once dry to protect the cane and enhance its natural color. Your chair is now complete.
Conclusion
How to weave a rattan chair is one of those projects that gives back far more than it takes. Yes, it requires patience and attention, especially the first time through. But the result — a handwoven chair that’s both functional and beautiful — is something you’ll be proud of for years to come.
The key is preparation. A solid frame, well-soaked rattan, and a steady hand during the pattern steps will get you most of the way there. The rest comes with practice.
Don’t be discouraged if your first attempt isn’t perfect; even slight imperfections in handwoven furniture add to its character and charm.
