To hang a whiteboard evenly, choose the right height first, then mark your placement with a tape measure and spirit level. Use a stud finder to locate wall studs where possible. If studs do not line up with your mounting points, use suitable drywall anchors or toggle bolts. Drill pilot holes, attach the brackets securely, mount the board, and check the final alignment before calling the job done.

Hanging a whiteboard looks simple until the board is on the wall and one side sits slightly higher than the other. Even a small tilt can be surprisingly noticeable, especially in an office, classroom, or study area where people look at the board every day.
The good news is that most uneven installations come from avoidable mistakes: rushed measuring, weak anchors, or brackets placed just a fraction off line. With a little patience and the right hardware, you can mount a whiteboard so it looks clean, stays secure, and works well for daily use.
This guide on how to hang whiteboards evenly walks through the full process, from choosing the height to tightening the final screws.
Tools and Materials You’ll Need
Before you begin, gather everything you will need for the installation. It is much easier to work carefully when you are not stopping every few minutes to search for a drill bit or pencil.
- Tape measure
- Pencil
- Spirit level, preferably a longer one, such as a 24-inch level
- Stud finder
- Power drill with appropriate drill bits
- Screwdriver, either Phillips or flathead, depending on your hardware
- Wall anchors, such as drywall anchors or toggle bolts
- Mounting screws and brackets, usually included with the whiteboard
- Step ladder
- Safety goggles
7 Simple Step-By-Step Guidelines on How to Hang Whiteboards Evenly
Step 1: Choose the Ideal Location and Height
Start by deciding exactly where the whiteboard should go. This step deserves more attention than it often gets. A board that is technically level can still feel awkward if it is too high, too low, or squeezed into a spot where people cannot use it comfortably.
Think about who will use the board most often. For adults in a typical office or home workspace, the center of the whiteboard usually works best at around eye level, which is roughly 57 to 60 inches from the floor. Use your tape measure to mark that center point, then work out where the top edge of the board will land based on the board’s height.
Once you have a rough placement, lightly mark the top center point with a pencil. Then step back. Look at the wall from a few angles and consider how the board sits in the room. Make sure it will not block doors, windows, switches, or walkways.
This brief pause can save you from a frustrating second attempt. Repositioning a whiteboard usually means patching holes, repainting small marks, or living with evidence of the first try.
Step 2: Locate the Wall Studs
Whenever possible, attach the whiteboard hardware directly to wall studs. Studs provide much better support than hollow drywall, especially for larger boards, glass whiteboards, or models with heavier magnetic backing.
Run your stud finder slowly across the area where the board will hang. When the tool beeps or lights up, mark the center of the stud with your pencil. Move carefully here; the edge of a stud is not as useful as the center when you are trying to fasten screws securely.
Most wall studs are spaced either 16 or 24 inches apart. After you find one, measure outward by those distances to check for nearby studs, then verify each one with the stud finder.

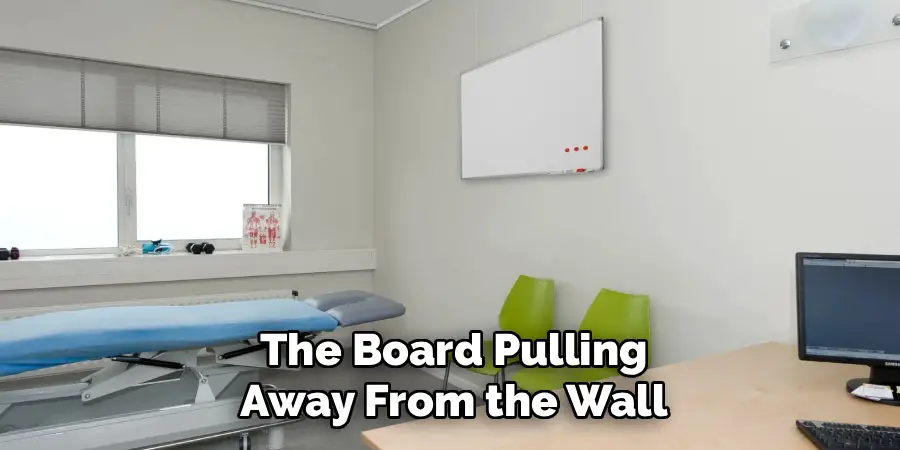
Your preferred whiteboard placement may not line up perfectly with the studs. That is common. If the brackets fall between studs, you will need suitable wall anchors. Still, fastening at least one side of the board into a stud can reduce the chance of the board pulling away from the wall over time.
Step 3: Draw a Level Reference Line
A straight reference line is the part of the job that keeps everything honest. Without it, even careful measuring can drift.
Hold your spirit level against the wall at the height you chose for either the top or bottom edge of the whiteboard. Adjust the level until the bubble sits centered between the indicator lines in the vial. Take your time. A small error here can show up clearly once the board is mounted.
When the level is horizontal, draw a light pencil line along its edge. If the board is wider than your level, extend the line in sections. Slide the level along the wall, line it up with the mark you already made, and continue the pencil line.
This line will guide your bracket placement. It may feel like an extra step, but it is one of the simplest ways to avoid a crooked installation.
Step 4: Mark the Bracket Placement
Now use the reference line to mark exactly where the screws or mounting brackets will go. Check the manufacturer’s instructions for your specific whiteboard. Different boards use different bracket spacing, and guessing can lead to holes in the wrong places.
Hold the brackets against the wall and align them with your level line. Measure the required distance between mounting points, then mark the center of each screw hole with your pencil.
Before drilling, check the spacing again. Measure between the marks on the wall and compare that distance with the mounting points on the back of the whiteboard. This kind of double-checking can feel repetitive, but it is much easier than correcting misplaced holes.
If your whiteboard uses a French cleat system, line up the full length of the cleat with your horizontal guide before marking the pilot holes. The cleat needs to sit level, or the board will follow its angle.
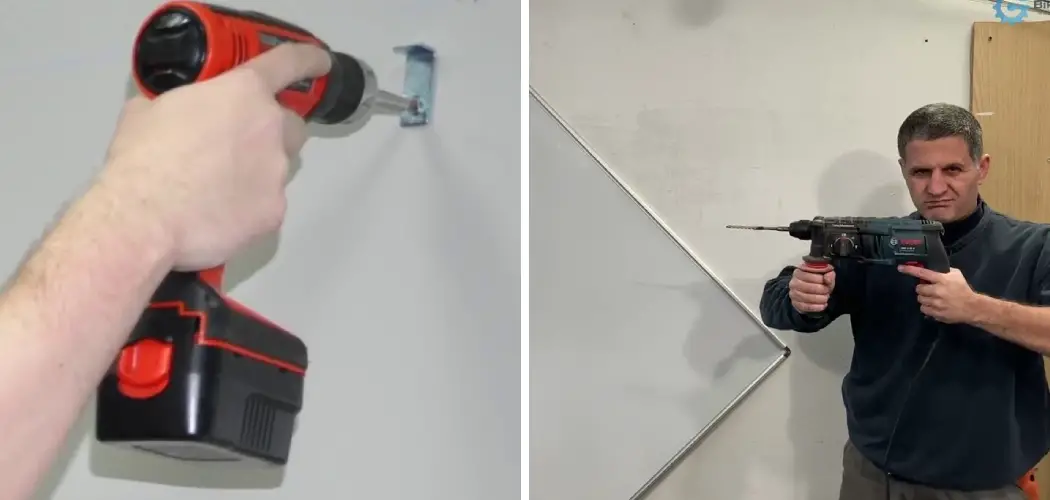
Step 5: Drill the Pilot Holes
With the hole locations marked, you can prepare the wall for the hardware. Put on safety goggles first. Drilling drywall or studs can send dust and small debris toward your face, and eye protection is a simple precaution.
Choose a drill bit that matches the size of your wall anchors. If you are drilling directly into wooden studs, use a slightly smaller bit than the screw so the screw can grip properly.
Hold the drill as straight as possible, perpendicular to the wall. If the drill angles up or down, the screw may not seat cleanly in the bracket.
Drill into each pencil mark using steady, controlled pressure. If you hit a stud, you will feel more resistance. In that case, you can usually drive the mounting screw directly into the wood. If the bit passes through the drywall without hitting solid wood, you will need to insert a wall anchor.
Once the holes are drilled, wipe or brush away loose drywall dust so the brackets can sit flat against the wall.
Step 6: Install the Wall Anchors and Brackets
If your mounting points fall in hollow drywall, insert the appropriate anchors into the pilot holes. Tap them gently with a hammer until they sit flush with the wall surface. Do not force them too aggressively; damaged drywall can weaken the hold.
For heavier whiteboards, toggle bolts generally provide more holding power than basic plastic drywall anchors. Use the hardware that matches the weight and style of your board.
Next, place the mounting brackets over the holes. Insert the screws through the brackets and drive them into the anchors or studs with a screwdriver or drill.
Tighten the screws until the brackets feel secure. Stop before overtightening. Too much pressure can strip an anchor, crack drywall, or make the hardware less reliable rather than more secure.
Before lifting the whiteboard, place your spirit level across the installed brackets. This last check is worth doing. If the brackets are not level now, the board will not be level later.
Step 7: Mount and Secure the Whiteboard
Once the hardware is firmly attached, you can mount the whiteboard. If the board is large or heavy, ask another person to help lift it. Trying to manage a bulky board alone can make it harder to align the hardware and may increase the risk of dropping it.
Lift the whiteboard carefully and line up the mounting fixtures on the back with the brackets on the wall. Lower the board into place until it sits securely.
Some whiteboards include additional screws through the lower frame. These help keep the board from shifting, swinging, or lifting off the brackets during use. If your model includes this step, follow the manufacturer’s instructions and secure those screws as directed.
Finally, step back and inspect the installation. Place the spirit level along the top edge of the board. If the bubble sits centered, your measuring and marking did their job. Following these steps on how to hang whiteboards evenly will ensure a professional-looking installation that is also functional.
Common Mistakes to Avoid
One of the most common mistakes is skipping the level or using one too casually. A whiteboard can look fine from close up and still appear noticeably crooked from across the room.
Another frequent problem is ignoring wall studs and relying only on weak plastic anchors. For small, lightweight boards, anchors may be enough. For heavier boards, especially glass or large magnetic models, poor support can cause the board to loosen or pull out of the drywall.
Skipping pilot holes can also create trouble. Drywall may crack or crumble when anchors are pushed in without proper preparation. Pilot holes give the hardware a cleaner path and usually lead to a neater installation.
Rushed measuring creates its own set of problems. If the bracket spacing is even slightly wrong, the board may not fit onto the hardware at all. Always compare the marks on the wall with the actual mounting points on the board before drilling.
Finally, do not underestimate the weight or awkward shape of the whiteboard. Lifting a heavy board alone can damage the wall, bend the brackets, or cause injury. A second person often makes the final step safer and much less stressful.
Do You Need To Use Professionals?
A standard lightweight whiteboard is usually a manageable DIY project if you have basic tools and work carefully. For many home offices, study rooms, and small meeting spaces, the steps above should be enough.
There are situations, though, where hiring a professional installer makes sense. Very large or heavy glass whiteboards can be difficult to lift, align, and secure without the right equipment. A professional may also be better prepared to assess whether the wall and hardware are suitable for the board’s weight.
Commercial office spaces can add another layer of difficulty, especially when walls contain metal studs. Those installations may require specialized hardware and drilling techniques that go beyond a typical DIY setup.
A professional can also reduce the risk of wall damage. Many installers carry liability insurance, which may offer some reassurance if something goes wrong during the job.
If you are not comfortable locating studs, using a drill, or choosing anchors, hiring help can save time and give you a more secure result.
Frequently Asked Questions
Q1: What Is The Best Height To Hang A Whiteboard In A Classroom?
In a classroom, the best height depends on the students who will use the board. For elementary school classrooms, the bottom edge of the whiteboard is often placed about 30 to 36 inches from the floor so children can reach it more comfortably.
For middle school and high school classrooms, the bottom edge is commonly raised to about 36 to 40 inches. That height can improve visibility from farther back in the room while still keeping the board practical for teachers and students.
Q2: Can I Hang A Whiteboard Without Drilling Holes In The Wall?
Yes, lightweight whiteboards can sometimes be hung without drilling by using heavy-duty adhesive strips, such as Command Strips. This approach is most suitable for small to medium-sized framed boards and can be useful for renters who want to avoid wall damage.
Adhesive strips are not a good choice for heavy glass whiteboards or very large magnetic boards. Over time, the weight may cause the adhesive to fail, which could cause the board to fall from the wall.
Q3: How Do I Clean My Whiteboard After Installation?
After installation, wipe the surface with a soft microfiber cloth to remove dust or manufacturing residue. For deeper cleaning, use a whiteboard cleaning spray or a mixture of isopropyl alcohol and water.
Avoid abrasive household cleaners, ammonia-based glass cleaners, and rough paper towels. These can scratch the surface or wear down the dry-erase coating, which may make the board harder to clean later.
Enjoy Your Newly Organized Space
A well-hung whiteboard does more than look neat. It gives you a reliable place to plan, teach, brainstorm, or keep daily tasks visible.
The key is not speed. It is careful measuring, suitable hardware, and a final level check before you finish. Those small details help the board stay secure and look professional on the wall.
Keep the surface clean with the right materials, and your whiteboard should remain easy to use for a long time. Whether it supports office planning, classroom lessons, or homework at home, it is now ready to become part of the room’s daily routine. Thanks for reading this guide on how to hang whiteboards evenly.