
A plain dresser, side table, or cabinet can become a custom piece with paper, glue, and a little patience. Decoupage is the craft of decorating a surface with paper cutouts, then sealing them so they look smooth, intentional, and long-lasting. Learning how to decoupage on furniture is a simple way to refresh old pieces without needing advanced painting or woodworking skills.
This method works well for beginners because you can start small. A drawer front, tabletop, or chair seat gives you enough space to practice without feeling overwhelmed. You can use napkins, tissue paper, wrapping paper, maps, book pages, wallpaper, or printed designs.
The key is preparation. Furniture needs to be cleaned, sanded, planned, glued, smoothed, and sealed in the right order. When you follow each step carefully, you avoid bubbles, peeling edges, and uneven finishes. This guide walks you through the full process so your finished piece looks polished and holds up to daily use.
Why Decoupage On Furniture Matters
Decoupage on furniture matters because it lets you give old pieces new life without spending much money. Instead of replacing a scratched table or outdated cabinet, you can turn it into something personal and useful.
It also gives you creative control. You can match a room’s colors, add vintage charm, create a bold statement piece, or cover small flaws in the surface. For renters, thrift shoppers, and DIY beginners, this is a practical way to decorate with style.
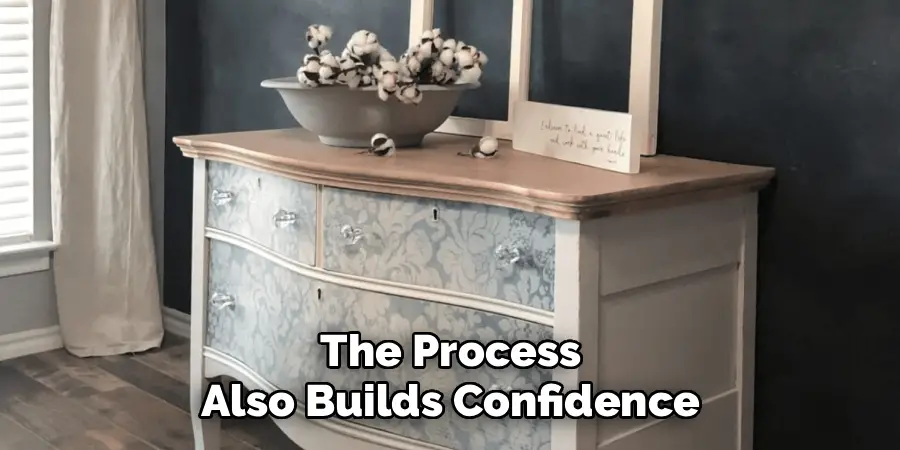
The process also builds confidence. Once you understand how paper, adhesive, and sealant work together, you can use the same method on larger or more detailed projects.
Step-by-Step Guide To How To Decoupage On Furniture
Step 1: Choose The Right Furniture Piece
Start with a piece that is sturdy, clean, and worth updating. Small tables, nightstands, stools, drawer fronts, and cabinet doors are great beginner projects because they have flat areas that are easier to cover.
Avoid furniture with loose joints, deep water damage, or peeling veneer unless you plan to repair it first. Decoupage can improve the look of a piece, but it will not fix structural problems.
If this is your first time trying how to decoupage on furniture, choose a simple surface rather than a heavily carved or curved one. Flat surfaces help you practice placement, smoothing, and sealing with fewer challenges.
Step 2: Gather Your Materials
Before you begin, collect everything you need so the project flows smoothly. You will need your chosen paper, decoupage glue or medium, a paintbrush or foam brush, scissors, a craft knife, sandpaper, a clean cloth, and a protective topcoat.
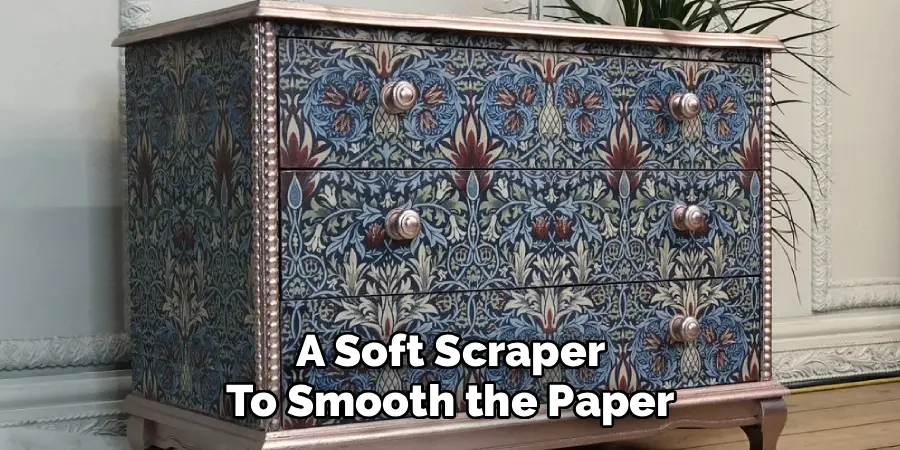
You may also want a brayer, old credit card, or plastic scraper to smooth the paper. These tools help push out air bubbles and excess glue.
Choose paper based on the look you want. Thin napkins create a soft, painted effect, while thicker paper gives bolder patterns. Test a small piece first so you know how it reacts to glue.
Step 3: Clean And Prepare The Surface
Furniture collects dust, oils, polish, and grime, even when it looks clean. Wipe the surface with a mild cleaner or a damp cloth, then let it dry fully. Any dirt left behind can stop the glue from bonding well.
Lightly sand the area you plan to decorate. You do not need to remove every bit of finish, but you should dull any glossy surface so the adhesive can grip.
After sanding, wipe away all dust with a tack cloth or slightly damp cloth. A smooth, clean surface helps the paper lie flat and reduces the chance of bumps under the design.
Step 4: Paint Or Prime If Needed
Some furniture looks better with a painted or primed base before decoupage. This is especially true when you use thin paper, such as napkins or tissue paper, because the background color may show through.
White or light paint makes colors appear brighter. Dark paint can create a moody, layered look, but it may dull delicate designs. Let the paint dry fully before adding paper.
Primer is useful on slick, stained, or laminate furniture because it helps later layers stick. If you skip this step on a difficult surface, your design may peel sooner. A good base makes the finished piece stronger and neater.
Step 5: Plan The Design Layout
Lay your paper pieces on the furniture before adding glue. This helps you see the final design and make changes while everything is still dry. Check pattern direction, color balance, and how the design lines up with edges, drawers, or handles.

If you are covering a large area, cut pieces slightly larger than needed. You can trim the extra after the glue dries. This is easier than trying to place a perfect edge while the paper is wet.
Take a quick photo of your layout if it has many pieces. Once you start gluing, that photo can guide you and prevent mistakes.
Step 6: Apply The Paper Smoothly
Brush a thin, even layer of decoupage medium onto the furniture surface. Place the paper carefully, starting at one edge and lowering it slowly. Use your fingers, a brayer, or a soft scraper to smooth the paper outward from the center.
A key part of how to decoupage on furniture is working gently. Wet paper can tear, stretch, or wrinkle if you press too hard. If you see a bubble, lift the paper slightly if possible, add a little more glue, and smooth it again.
Work in small sections instead of covering the whole surface at once. This gives you more control and keeps the glue from drying too quickly.
Step 7: Seal The Design
Once the paper is in place, let it dry completely before sealing. Drying time depends on the glue, paper thickness, room temperature, and humidity. Rushing this step can trap moisture and cause cloudy patches.
Apply a thin coat of decoupage medium over the paper. Brush in one direction and avoid overworking the surface. Let that coat dry, then add another coat for better protection.
For furniture that gets regular use, such as tabletops or drawer fronts, add several thin coats instead of one heavy coat. Thin layers dry clearer, feel smoother, and are less likely to show brush marks.
Step 8: Finish And Protect The Piece
After the sealed paper dries, inspect the edges. If any paper hangs over the side, trim it with a sharp craft knife or sand it gently downward along the edge. This creates a clean finish without pulling the paper loose.
For extra durability, apply a clear protective topcoat. Water-based polyurethane or a durable furniture sealer works well for pieces that may be touched often. Choose matte, satin, or gloss depending on the look you prefer.
Let the piece cure before heavy use. It may feel dry quickly, but the finish needs more time to harden. Careful curing helps prevent dents, scratches, and sticky spots.
Frequently Asked Questions
What Kind Of Paper Works Best For Decoupage?
The best paper depends on the look you want. Napkins and tissue paper blend into the surface and create a soft finish, but they tear easily. Wrapping paper, scrapbook paper, maps, and wallpaper are stronger and easier to handle. Thicker paper may need more glue and careful smoothing, but it can give bold, crisp results on furniture.
Can I Decoupage Over Painted Furniture?
Yes, you can decoupage over painted furniture as long as the paint is fully dry, clean, and firmly attached. Lightly sanding the painted surface helps the glue bond better. If the paint is peeling, flaking, or sticky, fix that first. A stable painted base can make the design look brighter and more polished.
How Do I Prevent Wrinkles And Bubbles?
Use thin, even glue layers and smooth the paper from the center outward. Work slowly and avoid soaking the paper with too much medium. A brayer, soft cloth, or plastic scraper can help press out trapped air. Some small wrinkles may appear with very thin paper, but careful placement and gentle pressure will reduce them.
Is Decoupage Durable Enough For Everyday Furniture?
Decoupage can be durable when it is sealed properly. Decorative pieces need only a few protective coats, while tabletops, desks, and cabinets need stronger sealing. A clear topcoat adds scratch and moisture resistance. However, decoupaged furniture should still be treated with care. Use coasters, avoid harsh cleaners, and wipe spills quickly.
Do I Need To Sand Between Sealant Coats?
Light sanding between coats can make the finish smoother, but it must be done carefully. Wait until the coat is fully dry, then use very fine sandpaper and gentle pressure. Wipe away all dust before adding the next coat. Do not sand thin or delicate paper directly unless it has enough sealed layers over it.
Conclusion
Decoupage is a beginner-friendly way to turn worn or plain furniture into something creative and personal. The best results come from choosing a good piece, preparing the surface, planning the layout, applying paper carefully, and sealing it well.
Small details matter, especially drying time, smooth edges, and thin protective coats. Start with a simple project, such as a drawer front or side table, before moving on to larger furniture. Now that you know how to decoupage on furniture, choose one piece, gather your materials, and try the process step by step.