
IPE wood furniture brings a touch of luxury and durability to any outdoor space. Known for its incredible density and rich, warm tones, Ipe (pronounced ee-pay) is a Brazilian hardwood that can withstand the elements for decades.
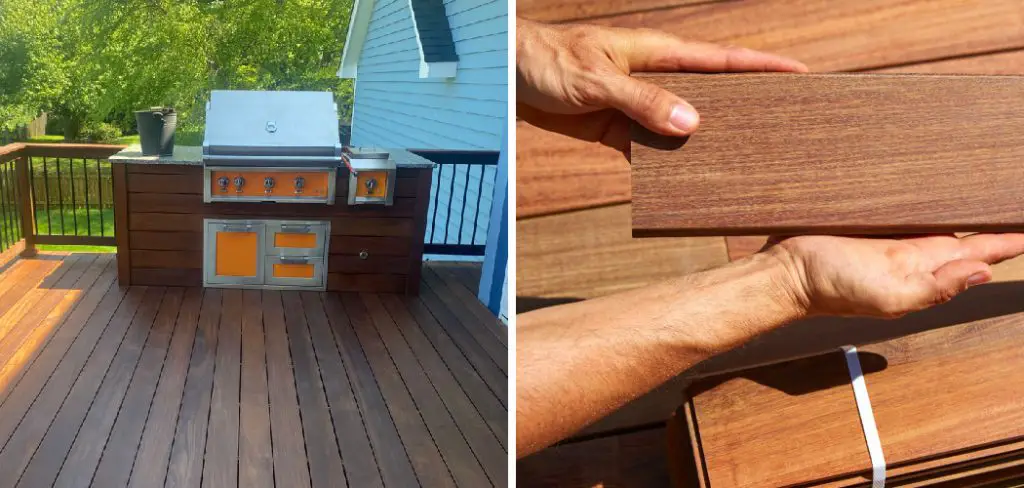
However, like any natural material exposed to sun, rain, and daily use, it requires proper care to maintain its stunning appearance. Without regular cleaning, Ipe can develop a silvery-gray patina, accumulate dirt, or become susceptible to mildew.
This guide on how to clean ipe wood furniture will provide you with a simple, step-by-step process to clean your Ipe furniture, ensuring it remains a beautiful and functional part of your home for years to come.
What Will You Need?
Before you begin, gather the necessary supplies to make the cleaning process smooth and efficient. Having everything on hand will save you time and ensure you get the best results.
- Mild soap or specialized wood cleaner
- Soft cloths or sponges
- Bucket of warm water
- Soft-bristled brush
- Protective gloves (if using harsh chemicals)
- Oil or wax for finishing (optional)
10 Easy Steps on How to Clean IPE Wood Furniture
Step 1: Prepare Your Workspace and Furniture
Before you start scrubbing, it’s important to set up your area properly. Move your Ipe furniture away from any surfaces you don’t want to get wet or oily, like a finished deck or stone patio. A lawn or a driveway covered with a drop cloth is an ideal spot.
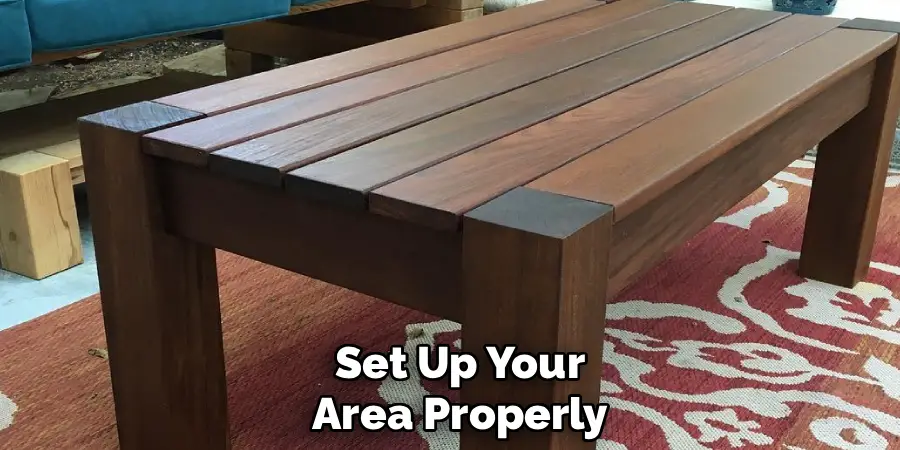
This not only protects your property but also gives you ample room to work. Once the furniture is in place, remove any cushions or fabric components. These should be cleaned separately according to their specific care labels. This initial setup prevents stains and ensures you can access every part of the furniture frame without obstruction.
Step 2: Brush Away Loose Debris
Your furniture has likely collected a layer of dust, leaves, cobwebs, and other loose particles. Using a soft-bristle brush, give every surface a thorough sweep. Don’t just focus on the large, flat areas like the tabletop or seats. Pay close attention to the joints, corners, and any decorative crevices where grime loves to hide.
A stiff brush might seem faster, but it can leave fine scratches on the wood’s surface. A soft brush is effective enough for this initial dry cleaning and prepares the wood for a deeper wash without causing any damage. This simple action makes the subsequent wet cleaning much more effective.
Step 3: Mix the Right Cleaning Solution
For this step, you have two main options. For routine cleaning, a simple mixture of mild dish soap and warm water in a bucket will work perfectly. However, if your furniture has developed mildew, stubborn stains, or has started to turn gray, an oxygen-based wood cleaner is the better choice.
These cleaners are specifically formulated to deep clean wood without using harsh chemicals. Avoid chlorine bleach or ammonia-based products at all costs, as they can strip the wood of its natural oils and cause permanent discoloration and damage to the wood fibers. Always follow the manufacturer’s dilution instructions for any commercial cleaner you use.
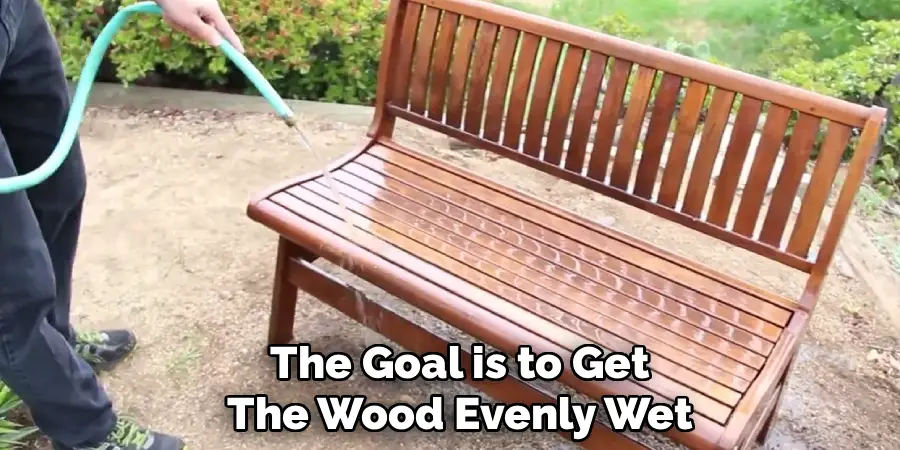
Step 4: Thoroughly Wet the Furniture
Using a garden hose with a spray nozzle, completely saturate the Ipe furniture with water. It’s best to set the nozzle to a gentle shower or mist setting. The goal is to get the wood evenly wet, not to blast it with high pressure.
This pre-rinse serves two purposes: it helps the cleaning solution spread more evenly across the surfaces, and it prevents the cleaner from drying out too quickly on any single spot, which could lead to an uneven finish. Ensure every part of the furniture is damp before you begin scrubbing.
Step 5: Scrub with the Grain
Dip your soft-bristle brush into your prepared cleaning solution and start scrubbing. The most important technique here is to always scrub in the same direction as the wood grain. This helps lift the dirt from the wood’s pores without creating cross-grain scratches.
Work in small, manageable sections, applying firm but gentle pressure. For areas with more significant buildup, you might need to apply a bit more effort, but let the cleaner do most of the work. Re-dip your brush frequently to keep the area sudsy and lubricated.
Step 6: Rinse Completely
Once you have scrubbed the entire piece, it’s time to rinse away all the soap, grime, and cleaning solution. Use your garden hose to thoroughly wash the furniture from top to bottom. Make sure you rinse every nook and cranny.
Any cleaning residue left behind can interfere with the oiling process and may become sticky, attracting more dirt over time. A complete and thorough rinse is key to a professional-looking result.
Step 7: Allow the Furniture to Dry Completely
Patience is crucial for this step. After the final rinse, you can use a clean, absorbent cloth to wipe away excess water. Then, you must let the furniture air dry completely. This can take anywhere from 24 to 48 hours, depending on the weather, humidity, and airflow.
Do not proceed to the next step until the wood is bone-dry to the touch. Applying oil to damp wood will trap moisture, which can lead to mildew growth under the finish and prevent the oil from penetrating properly.
Step 8: Lightly Sand for a Smooth Finish
After washing, you may notice some wood fibers have raised, creating a slightly “fuzzy” or rough texture on the surface. This is normal. To get a perfectly smooth finish, take a piece of 120-grit sandpaper and lightly sand the entire piece of furniture.
Again, always sand in the direction of the wood grain. This quick sanding pass will knock down the raised grain and create a silky-smooth surface that is ideal for accepting oil. Once you’re done sanding, use a tack cloth or a clean, dry rag to wipe away all the sanding dust.
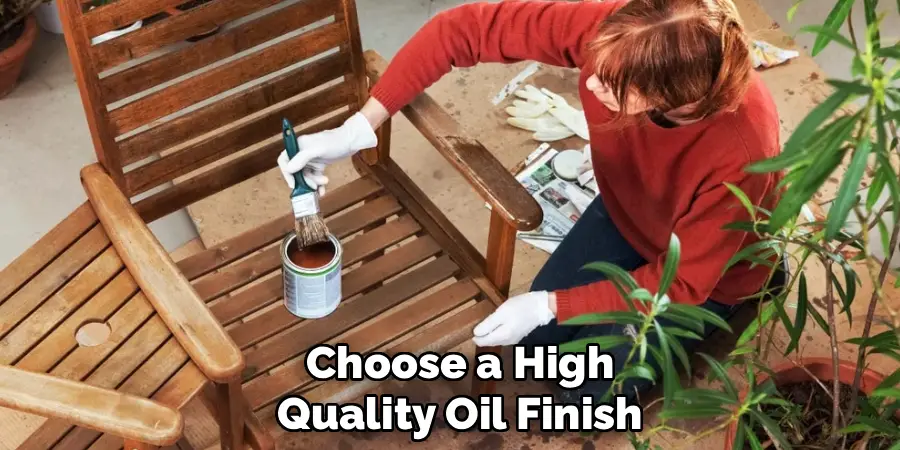
Step 9: Apply a Coat of IPE Wood Oil
Now for the most satisfying step: restoring the wood’s color. Choose a high-quality oil finish specifically designed for Ipe or other hardwoods, preferably one with UV inhibitors to protect against sun damage.
Apply a thin, even coat of oil using a clean, lint-free cloth. Work it into the wood, moving with the grain and covering a small section at a time. The wood will darken immediately as it soaks up the oil. Your goal is to saturate the wood, but not to leave puddles of oil on the surface.
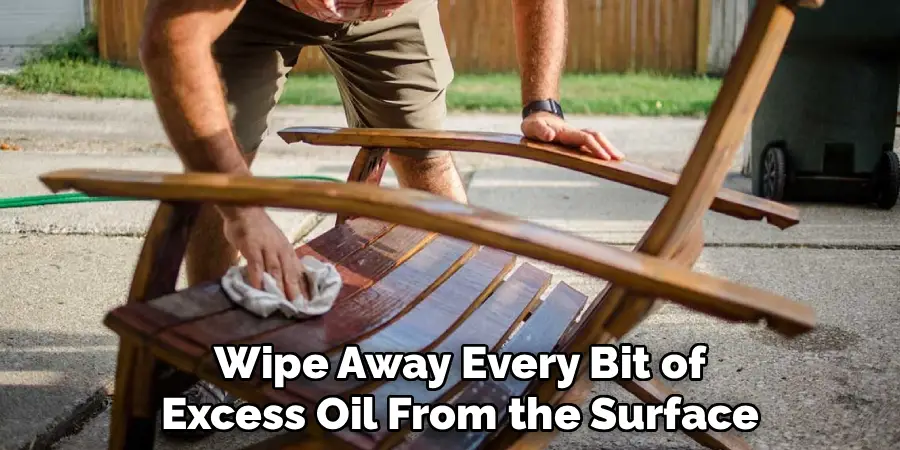
Step 10: Wipe Off All Excess Oil
After applying the oil, let it sit and penetrate the wood for about 15-30 minutes (check the product instructions for specific times). This allows the wood to absorb as much as it can. After this waiting period, take a new, clean cloth and wipe away every bit of excess oil from the surface.
This is a non-negotiable step. Any oil left sitting on the surface will not dry properly and will instead become a sticky, tacky mess that attracts dust and dirt. A properly oiled piece of furniture should feel dry to the touch, not oily. Let the furniture cure for another 24-48 hours before use.
5 Things You Should Avoid
- Using a Pressure Washer: The high-pressure stream can splinter the wood, damage the fibers, and leave permanent marks.
- Using Harsh Chemicals: Avoid chlorine bleach, ammonia, and other aggressive cleaners that can discolor and damage the wood.
- Applying Oil to Wet or Dirty Furniture: This will trap moisture and dirt, leading to mildew growth and a poor finish.
- Leaving Excess Oil on the Surface: This creates a sticky residue that attracts dirt and never fully dries.
- Using Thick Varnish or Polyurethane: These coatings form a film on the surface that will eventually peel and crack under sun exposure, creating a difficult-to-repair mess.
By avoiding these common mistakes, you can ensure that your wooden furniture retains its beautiful and durable finish for years to come.
Frequently Asked Questions
- How Often Should I Clean My Ipe Furniture?
For general cleaning to remove pollen and dust, a simple wipe-down every few weeks is sufficient. A deep clean and re-oiling session, as described above, is recommended once a year. This annual maintenance will keep your furniture protected and maintain its rich color, especially if it is heavily exposed to the elements. - What Happens if I Don’t Oil My Ipe Furniture?
If you choose not to oil your Ipe furniture, it will naturally weather over time to a beautiful silver-gray patina. This is a purely cosmetic change and does not affect the structural integrity of the wood. Some people prefer this weathered look, but it’s important to continue cleaning it annually to prevent mildew and dirt buildup. - Can I Restore Ipe Furniture That Has Already Turned Gray?
Yes, you can restore grayed Ipe wood to its original brown color. The process involves a thorough cleaning with an oxygen-based wood cleaner to remove the oxidized gray layer. After cleaning and allowing it to dry completely, you may need to do some light sanding before applying a coat of Ipe oil to bring back the rich, warm tones.
Conclusion
How to clean IPE wood furniture is a straightforward process that pays off with lasting beauty and durability.
By following these simple steps for cleaning and oiling, you can easily maintain its luxurious appearance and protect it from the elements. A little annual effort ensures your outdoor furniture remains a stunning and inviting centerpiece for gatherings, relaxation, and enjoyment for many years to come.
Now you know how to keep your Ipe wood looking as good as the day you bought it.